Step By Step On How To Install Zend Optimizer In Linux Server
This Page Contains information about Step By Step On How To Install Zend Optimizer In Linux Server By administrator in category Tutorial And Guides with 20 Replies. [1405], Last Updated: Sat May 18, 2024
administrator
Sun Jul 30, 2006
20 Comments
29758 Visits
This tutorial is for the purpose of showing our Webune customers how to install the Zend Optimizer in their dedicated servers with Redhat, Fedora, Centos Linux:
NOTE: If you are a Webune Managed Customer, Please contact support and Webune will install The Zend Optimizer on your Dedicated Server Service At no charge. If you are not a Managed Customer, but would like Webune to install The Zend Optimizer for you, please contact our sales team to request this service.
1. Downloading - Download a copy of the Zend Optimizer from zend.com
>> Be sure to select the "Linux x86" option when downloading <<
When you click ont "Linux x86" in a couple of seconds, you will see this:
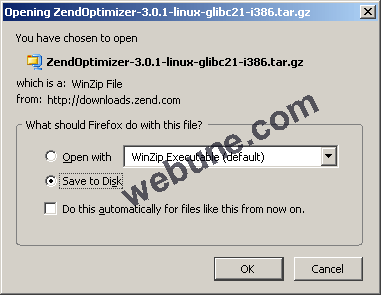
2. Upload - After you have downloaded a copy of the Zend Optimizer, (If you need to , upload the tar.gz file into your server)
3. SSH - Login to your server with an SSH Session and go to the directory where you uploaded the Zend file.
3. Unpack - Once you have the Zend tar.gz file in your server, untar the ZendOptimizer-3.0.1-linux-glibc21-i386.tar.gz file with the following command:
4. Change Directory - Once all the files have been unpacked, change to the newly created Zend Optimizer directory with this command:
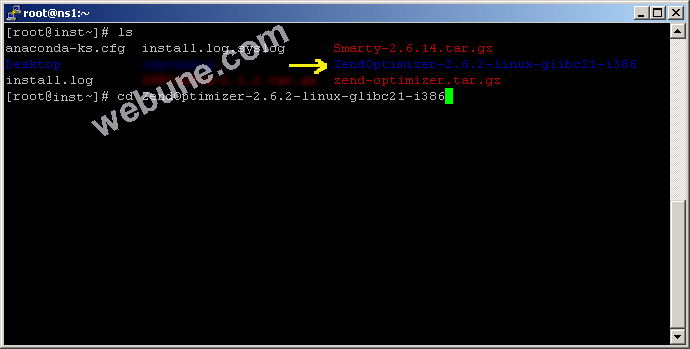
5. Confirm - Once you have changed directory, Make sure the install.sh file has been created. To list the files send this command:
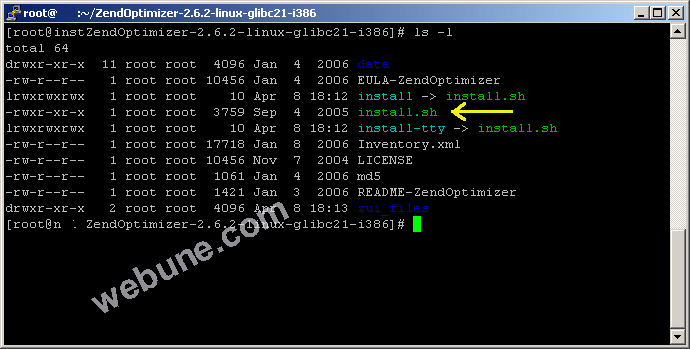
6. Install - Now that you have confirmed that the install.sh file has been created execute the followng command to begin installation:
7. Zend Install Step1: Hit Enter on your keybord for OK
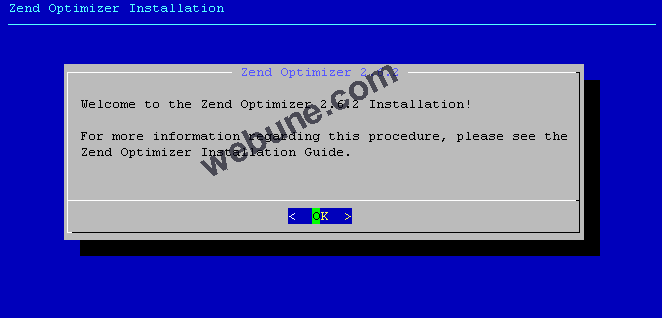
8. Zend Install Step2: Accept License Agreement by hitting Enter on your keyboard
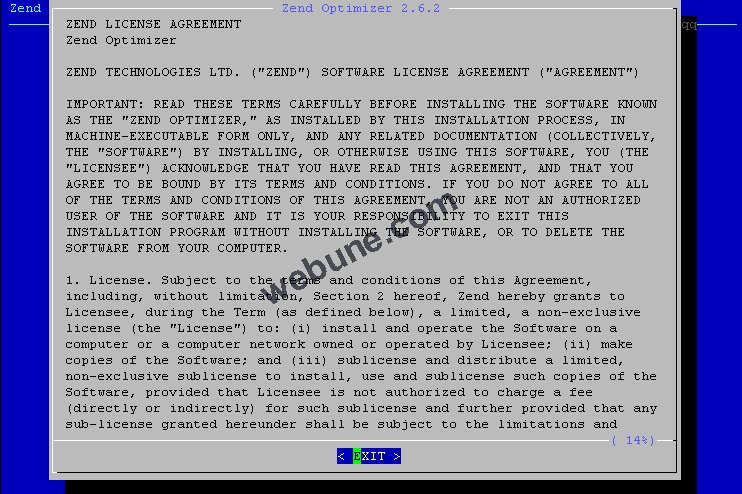
9. Zend Install Step3: Hit Enter for Yes
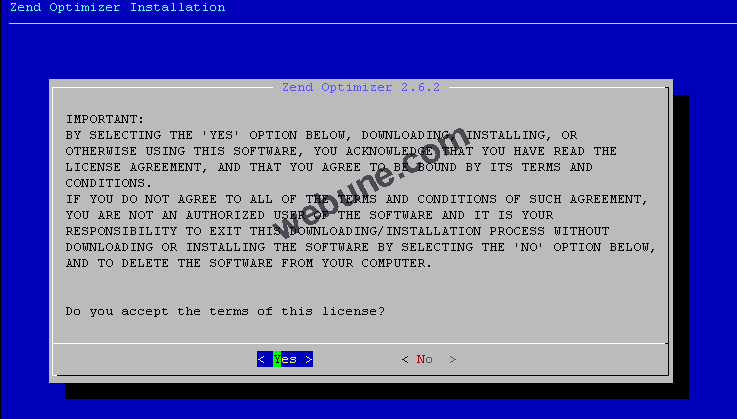
10. Zend Install Step4: Hit Enter on your keyboard for OK
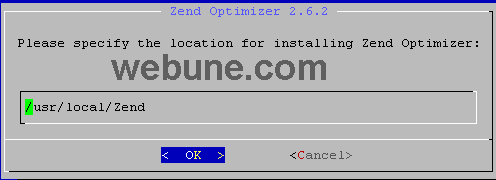
11. Zend Install Step5: Hit Enter on your keyboard for OK
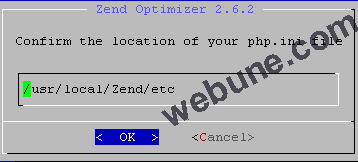
12. Zend Install Step6: Hit Enter for Yes
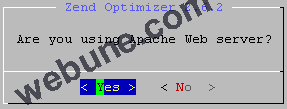
13. Zend Install Step7: Hit Enter on your keyboard for OK

14. Zend Install Step8: Hit Enter on your keyboard for OK
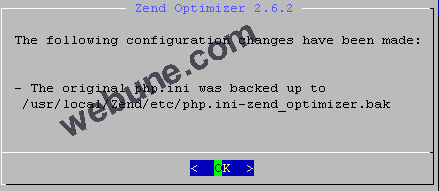
15. Zend Install Step9: Hit Enter on your keyboard for OK

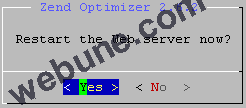
16. Zend Install Step10: Hit Enter for Yes to restart Apache
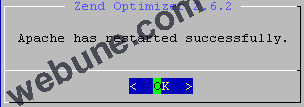
17. Zend Install Step11: Hit Enter on your keyboard for OK to Finish Installation
DONE
NOTE: If you are a Webune Managed Customer, Please contact support and Webune will install The Zend Optimizer on your Dedicated Server Service At no charge. If you are not a Managed Customer, but would like Webune to install The Zend Optimizer for you, please contact our sales team to request this service.
1. Downloading - Download a copy of the Zend Optimizer from zend.com
>> Be sure to select the "Linux x86" option when downloading <<
When you click ont "Linux x86" in a couple of seconds, you will see this:

2. Upload - After you have downloaded a copy of the Zend Optimizer, (If you need to , upload the tar.gz file into your server)
3. SSH - Login to your server with an SSH Session and go to the directory where you uploaded the Zend file.
3. Unpack - Once you have the Zend tar.gz file in your server, untar the ZendOptimizer-3.0.1-linux-glibc21-i386.tar.gz file with the following command:
CODE:
tar xvfz ZendOptimizer-3.0.1-linux-glibc21-i386.tar.gz
4. Change Directory - Once all the files have been unpacked, change to the newly created Zend Optimizer directory with this command:
CODE:
cd ZendOptimizer-3.0.1-linux-glibc21-i386

5. Confirm - Once you have changed directory, Make sure the install.sh file has been created. To list the files send this command:
CODE:
ls -l
and you will see something like this:
6. Install - Now that you have confirmed that the install.sh file has been created execute the followng command to begin installation:
CODE:
./install.sh
7. Zend Install Step1: Hit Enter on your keybord for OK

8. Zend Install Step2: Accept License Agreement by hitting Enter on your keyboard

9. Zend Install Step3: Hit Enter for Yes

10. Zend Install Step4: Hit Enter on your keyboard for OK

11. Zend Install Step5: Hit Enter on your keyboard for OK

12. Zend Install Step6: Hit Enter for Yes

13. Zend Install Step7: Hit Enter on your keyboard for OK

14. Zend Install Step8: Hit Enter on your keyboard for OK

15. Zend Install Step9: Hit Enter on your keyboard for OK

16. Zend Install Step10: Hit Enter for Yes to restart Apache

17. Zend Install Step11: Hit Enter on your keyboard for OK to Finish Installation

DONE
fab
Fri Sep 10, 2010
Hola ya baje ZendOptimizer ya esta desempaquetado; al intentar instalar me aparece el siguiente mensaje:
./install.sh: 140: ./php: not found
Alguien sabe como corregir esto o por que pasa?
pual
Mon Mar 29, 2010
mercy pour comment installer zend optimizer en linux
Wei
Fri Mar 05, 2010
I can't found install.sh (ZendOptimizer-3.3.9-linu
https://www.wallpaperama.com/forums/how-to-install-zend-optimizer-in-linux-server-t82.html
https://www.wallpaperama.com/forums/how-to-install-zend-optimizer-in-linux-server-t82.html
Abhijit
Thu Sep 17, 2009
hey i just couldn't do this...can someone please do this for me...i tried doing it many many times
Chris
Fri Aug 21, 2009
worked a treat
thank you
thank you